Strawberry Chia Seed Jam

IMG_1794 IMG_1795 IMG_1804 IMG_1805

Store bought jam is packed full of sugar and weird stuff, and ain’t nobody got time to can it themselves. Here we have a super easy, raw strawberry chia seed jam packed full of fiber & protein that can be made in less than 5 minutes. No cooking required!

Strawberry chia seed jam:
Ingredients:
1 cup strawberries
1/3 cup chia seeds (run these through a cleaned coffee grinder until they’re powder for smoother jam)

Directions:
Combine strawberries and chia seeds in a food processor and blend until smooth (or desired consistency). Store in jars in the fridge for 2 hours until jam thickens & slather it on all your favorite things.

Chocolate Chip Cashew Cookie Balls

IMG_1775Screen Shot 2013-07-15 at 3.19.56 PM

I don’t about you guys, but I’m a big fan of eating constantly…meaning I basically don’t leave the house without lots of snacks on me. These chocolate chip cookie dough balls are one of my go-to snacks when running out the door or for throwing in a backpack.

Ingredients:
1 cup raw cashews (soaked 1 hour-overnight)
1 cup dates, pitted
1/3 cup dark chocolate chips

Directions:
Soak 1 cup of dates in warm water for 1/2 hour & 1 cup of cashews for at least an hour (but overnight is most ideal for easy blending). Drain the dates and the cashews & blend in a food processor until it forms a sticky, even consistency and holds together well. The mixture should start to form a big ball in your food processor when it is ready.

Stir in chocolate chips (optional, or you could add dried fruit, coconut, more nuts, really whatever you want)  & roll into balls. Let refrigerate for an hour before eating or packing for best results!

Chocolate Chip Cookie Dough Hummus

Chocolate Chip Cookie Dough Hummus

IMG_1786

Growing up with a Lebanese grandmother, hummus was always a family favorite and could never be store bought if you didn’t want to face her wrath. After years of making hummus from scratch and experimenting with numerous “savory” versions (hello,  jalapeño cilantro, avocado lime, and roasted red pepper garlic) it was time for a “sweet” variation. I replaced the traditional tahini (sesame seed paste) with another seed/nut butter (peanut butter) and added some other sweet touches, and I must say…holy chickpeas this stuff turned out DELICIOUS!

Not to mention, it’s gluten free, vegan, and packed with fiber and protein. I did the nutritional analysis on this recipe, and for something so sweet it’s much less sinful than you might think. In a 3 tbsp serving (though, let’s be real…I usually eat the whole bowl) this dip provides 22% of your recommended daily fiber, 7.3 grams of protein, and 12% of your daily iron at only 176 calories. Feel free to indulge, my friends.

Ingredients:
1 1/2 cup garbanzo beans (or 1 can, rinsed and drained)
3 tbsp peanut butter
1 tbsp coconut oil
1 tbsp honey
1/3 cup dark chocolate chips
1 tsp vanilla extract
½ tsp cinnamon

Directions:
▪   Combine your rinsed garbanzo beans, peanut butter, coconut oil, honey, vanilla extract, and cinnamon and process them in a food processor until smooth.
▪   Remove from food processor and stir in chocolate chips by hand.
▪   Pour into serving dish

Really easy and super delicious! I like to serve this cookie dough dip with apple and pear slices, but it could also be really awesome as a dip for graham crackers. If you don’t do peanuts, you could easily replace the peanut butter with almond butter, sunflower seed butter, or whatever else you like. 🙂

This recipe makes about 8-10 servings of around 3 tbsp each.

IMG_1778

Here are the nutrition facts, in case anyone was wondering. 🙂

cookie dough hummus

Chopped Kale Salad w/ Vegan Béchamel Sauce

20140324-234000.jpg

This salad is so decadent, I could seriously eat it every day. It’s hard to believe it’s totally vegan & gluten free. It’s almost like the salad equivalent to mac and cheese….that good.

Add to salad bowl:
-2 cups raw chopped kale, Brussels sprouts, broccoli, red & green cabbage (Trader Joe’s “Cruciferous Crunch” salad blend is awesome!)
-1/2 cup cherry tomatoes, halved

Make the vegan béchamel sauce using the following ingredients:

-1 tbsp Earth Balance vegan margarine or olive oil
-1 tbsp ground cashews or cashew meal
-1 tbsp nutritional yeast
-1/2 cup vegetable broth
-Pinch of sea salt & cracked pepper

Add the above sauce ingredients to a saucepan, whisking constantly over low to medium heat. Make sure that it doesn’t boil, but rather melts and reduces. The sauce will become smooth, creamy, and thick.

Remove from heat, immediately pouring piping hot sauce over bed of greens, allowing them to wilt a bit.

Enjoy!

Coconut Lime Bars

Yield: 16 bars Gluten- free, Grain-free, Vegan, Dairy-free, Egg free I am excited to share with you guys one of my all time favorite baked goods! It’s really hard to beat the combination of limes and toasted coconut in this tangy, sweet, delicious bar that is surprisingly creamy for something that it doesn’t have any eggs, […]

Vegan Banana “Cheesecake”

Yield: 20 servings
Prep: 20 minutes
Freezer time: 3-5 hours

1385058_10152290361728838_1719034123_n

Highlights:

  • Vegan
  • Gluten-free
  • High in fiber
  • Packed with protein
  • Totally raw & doesn’t require baking
  • Made almost entirely from various fruits & nuts and is very adaptable

Ingredients

For the crust:
1 cup walnuts
1 cup almonds
¾ cup medjool dates
pinch of sea salt
1/4 cup raw, dried coconut (optional)

For the “cheesecake” layer:
3 cups cashews
1 cup macadamia nuts
¾ cup lemon juice
½ cup coconut oil
1 tbsp vanilla extract
¼ cup agave

For the banana layer:
6 bananas, peeled and frozen
1/3 cup dates

Directions:
Soak cashews & macadamia nuts for 2-4 hours (or overnight), then drain.

Soak dates for 5-10 minutes and remove pits from center.

Add walnuts, almonds, dates, and salt to food processor and pulse until well combined. Nut pieces should be well chopped and still crumbly, but easily able to form a malleable ball.

Prepare the bottom of a springform pan (or cake pan, or glass dish, it doesn’t really matter) by sprinkling coconut on the bottom or greasing with coconut oil. Press nut and date mixture into prepared pan to form the “crust” layer.

Next, add drained cashews and all other “cheesecake” layer ingredients into the food processor or high-powered blender and blend until smooth and creamy

Pour creamy “cheesecake” layer into the pan evenly over the crust and smooth. Place the pan into the freezer for ~30-60 minutes to allow the layers to firm up.

Prepare banana layer by adding all ingredients into the blender or food processor and blending until creamy and smooth. Add banana layer on top of the firmed and frozen cheesecake layer. (Note: Any frozen fruit could be used instead of bananas, you’ll need around 2 cups of fruit regardless)

Decorate the top as you please with fresh fruit, nuts, shredded coconut, whipped coconut cream, etc…whatever you want, really.

Place in the freezer for 2-5 hours, and remove 10-20 minutes before ready to serve (or don’t wait and eat it frozen, it’s really good too). Leftovers can easily be stored in the freezer and make for an awesome snack.

IMG_2473


Homemade Granola

In my opinion, there is absolutely no better breakfast than homemade granola sprinkled on top of some coconut yogurt and topped with berries. It’s easy, satisfying, and (best of all in the morning)….quick.

As it turns out, granola is pretty easy to make for yourself, and the secret isn’t what you put in it as much as it is the process. Making you own breakfast cereal can be a much healthier (and cost friendly) alternative to store-bought cereals and granolas that are packed with additional sugar and food additives.

Who needs that junk anyway?

IMG_1843

So here’s my basic, go-to recipe and process for making the perfect homemade granola.

Dry Ingredients:
5 cups whole oats (check for gluten free if necessary)
1 cups chopped almonds
1 cup pepitas (I use Trader Joe’s roasted and salted)
1 cup chopped pecans
3 tbsp cinnamon

Mix all above ingredients in a large bowl. Preheat oven to 350. Cover 2 cookie sheets in parchment paper or spray them down with oil and set aside

Mix these ingredients together in a saucepan until they’re warm:
1/2 cup honey (use agave syrup for vegan)
1/2 cup maple syrup
1/2 cup molasses
1/2 cup coconut oil

Once the liquids are warm, toss them together with the dry ingredients & mix well.

After mixing, divide the granola in even layers between the two sheets. Put it in the oven.

You’re going to want to set a timer for 10 minutes. At this point, take both trays out of the oven and stir the granola around, mixing completely before putting it back in and setting another 10 minute timer.

You’ll repeat this process roughly 3-5 times (totally dependent on your oven) for a cooking time of roughly 30-45 minutes or until nicely browned.

IMG_1835

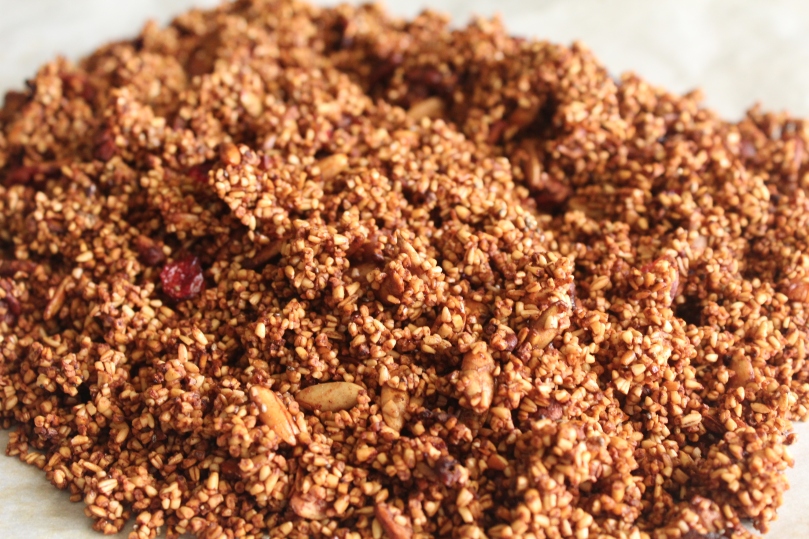
After removing the granola from the oven, toss in 1 cup of dried fruit (I like to use dried orange-infused cranberries, but anything goes here)

Allow the granola to cool and place into a container to store in the fridge where it’ll keep for several months.

Pro tip #1: even when it’s done, it won’t actually be crispy until it cools down. It can be really easy to overcook or burn by feel, because it stays pretty soft the entire time. A good indication is the color; when it looks golden and toasty.

Pro tip #2: It’s soo easy to burn the crap out of soo quickly (as I discovered), so the secret is constantly watching it, especially on the 3rd or 4th round in the oven. It can be a bit persnickety, but it gets significantly better each time you make it.

Pro tip #3: You can control the size of the granola clusters by stirring more or less when you take it out of the oven. For larger clusters, be mindful not to stir as vigorously and let the granola rest until cooled after removing from the oven when finished.

This recipe can be diversified by adding whatever nuts, spices, or dried fruits you prefer.

IMG_1836

Garlic and Chive Cashew “Cheese” Dip

Garlic and Chive Cashew “Cheese” Dip

Image

I will start by saying I am a huge lover of cashew cheese and this recipe did not disappoint. It is free of  dairy, is totally vegan, and full of protein, healthy fat, and flavor.

This “cheese” dip gets it’s flavor from nutritional yeast, which can be purchased at health food stores or many places online (I’ve bought it on Amazon before). Nutritional yeast, for those who aren’t familiar with it, is a deactivated yeast that has an almost cheesy flavor. It is an awesome addition to soups, rice, as a topping for popcorn, or anything that needs that extra little bit of “cheese”. Nutritional yeast is a favorite among people on a plant-based or vegan diet because it can serve not only as a replacement to cheese, but also as a dietary supplement. It is actually a complete protein, full of B-complex vitamins (crucial for cell metabolism and energy, and a group of vitamins that can sometimes be a challenge to get enough of for non meat-eaters), and free of gluten, dairy, and sugar.

Ingredients
(Makes about 8 servings)

-2 tbsp Nutritional Yeast
-1 cup raw cashews
-1/2 tbsp olive oil
-1 clove garlic
-2 tsp chopped chives

Directions
-Soak raw cashews overnight
-Drain water from cashews
-Combine all ingredients in a food processor until creamy and dip is smooth without any pieces of cashews left

Yeah…SUPER EASY!

Imagecp

Enjoy as a dip with either veggies or crackers. 🙂

Here’s the nutrition facts, for anyone who was wondering:

Image